Tags
Sessions can be categorized based on various criteria, such as level, language, and topic. No two events are identical, and for this reason, Koliseo supports flexible, customizable tagsets unique to your event. These tagsets can be used to filter sessions in the agenda or to design a balanced agenda.
Create tags
As an example, we are going to configure tags for an event where sessions have assigned a “Talk Level” that can choose between “Beginner”, “Intermediate” or “Advanced”. To do this:
- Log into the system
- In the sidebar menu, select Events and click on the name of your event to open the event management page.
-
In the sidebar menu, select Agenda > Tags.
-
Click the Add Tagset button. The Tagset edition page will open.

In this form, you can introduce the following:
- Name: The name of the tagset. In our example, we will introduce “Programming Language”.
- Mutiple Choice: If you want to allow multiple tags to be selected for each session, mark this checkbox.
- Visibility: The visibility of the tagset. The options are:
- PUBLIC: The tagset will be visible in the session dialog, but not in the agenda grid.
- HIGHLIGHT: The tagset will be shown both in the session dialog and in the agenda grid.
- HIDDEN: The tagset will only be visible to the event organizers and the selection committee. This is useful for internal tags that you don’t want to show to the attendees, like state of the session (accepted / rejected), one or multiple waitlists, and more.
Once you have introduced the tagset, click the Add Value to add each of the possible values for this tagset. For example, for a theoretical case of a “Session State” tagset, we could use “Approved”, “Rejected” and “Waitlisted” as possible values (in this example, remember to mark the tagset private).
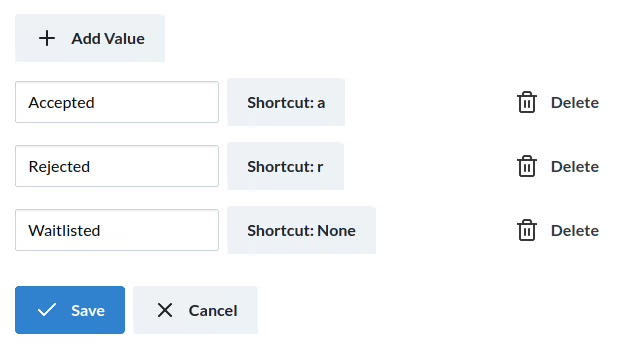
When you add tagset values, you can set a shortcut for each value. When reviewing sessions, the shortcut key can be used to easily toggle the value of the tag. In this example, we have set the chortcuts for “accepted” to a and “rejected” to r. When reviewing sessions, you can press a or r to quickly toggle the state of the session.
Default Tags
When you create a new event, there is a set of default tags that get automatically created for you:
- Language: the language of your presentation (required, visibility
HIGHLIGHT). The allowed values are “Español” and “English”. - Level: the level of your presentation (required, visibility
HIGHLIGHT). The allowed values are “Beginner”, “Intermediate” and “Advanced”. - Stage: the stage of the presentation (optional, visibility
PRIVATE). The allowed values are “Accepted”, “Rejected”, and “Waitlisted”.
Filter using tagsets
During session review and in the final agenda, the users can filter sessions by tags. For example, in the session review page, the selection committee can filter sessions by level, language, or any other tag that you have configured. To open the filter dialog, click the text box at the top of the screen.
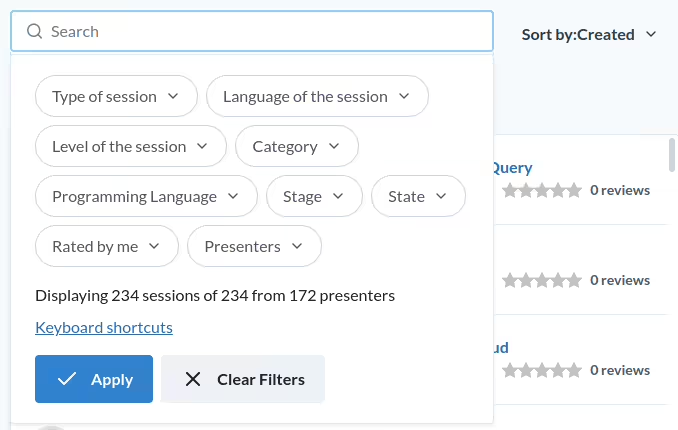
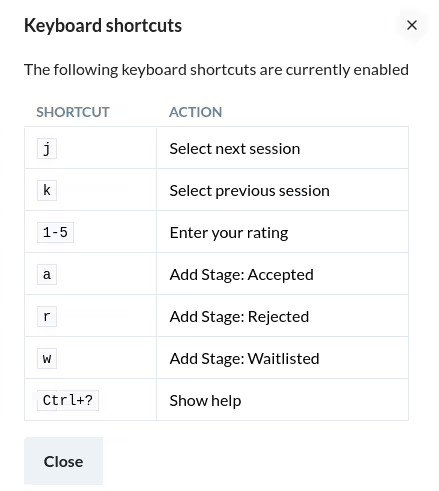
When reviewing sessions, this dialog includes a “Keyboard shortcuts” link to show the list of shortcuts that you can use to quickly move between sessions and toggle the tags.