Badges
Badges are an essential part of any event, helping to identify attendees, speakers, and staff while adding a professional touch to your event experience. With Koliseo, you can generate and print customized badges directly from the platform, using either our ready-made templates or your own HTML designs.
This guide covers pre-print badges, which are intended to be prepared before the event. For printing badges on demand at the event itself using a thermal label printer, see On-Site Badges.
Requirements
To create badges, your account must have a subscription that includes this feature. You can review the features of the different subscription plans in the pricing and plans page.
Speaker Badges
Speaker badges are managed from the sidebar menu under Agenda > Badges. The process uses a two-step flow:
Step 1 — Select content
Use the session filter to narrow down the sessions whose speakers you want to print badges for. For example, filter by State: Published to include only confirmed speakers.
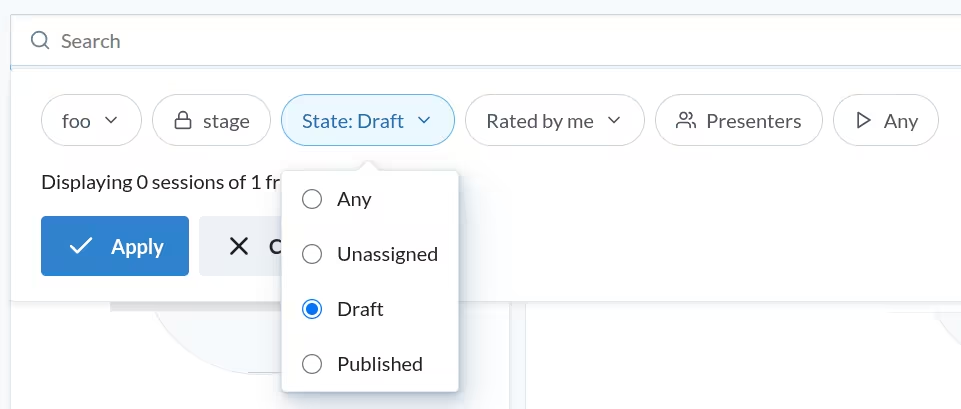
Once you are happy with the selection, click Next to move to the design step.
Step 2 — Design setup
Choose a template, customise it if needed, and print. See Choosing a Template below for details.
Attendee Badges
Attendee badges are managed from the sidebar menu under Tickets > Badges. Click the Pre-print Badges tab. All sold tickets are loaded automatically — if a purchase includes multiple tickets, a badge is generated for each one.

Choosing a Template
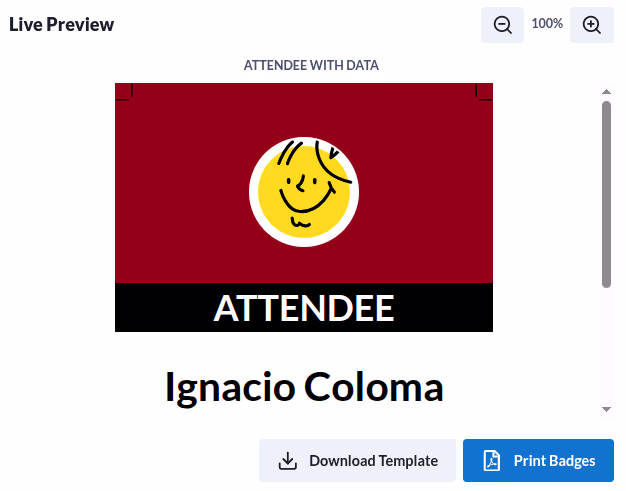
Both flows share the same template selector and editor, displayed as a split layout: the template list, the editor and the live preview.
The panel lists the available predefined templates, each showing a sample of the first badge. Click a template to preview how the badges will look for your current data.
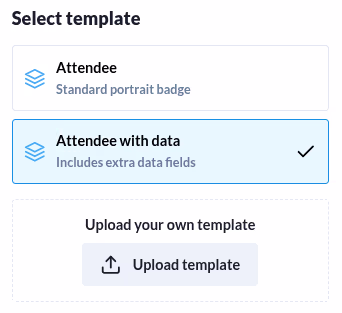
If you want to make modifications to the template, you can use the editor or you can just click Download Template and follow the instructions to design your badge template below. Once you have your custom template ready, you can use it by clicking the Upload Template button in the dialog.
When you are ready, click Print Badges to open the browser print dialog.
Designing your Badge Template
Templates are HTML files with your desired design. The platform will look for specific elements in the template with syntax ${element} to populate with the information of the speaker or attendee. The following identifiers are available to be used in the template:
- ${avatar}: Profile image of the user.
- ${name}: User name.
- ${uuid}: UUID of the user.
- ${twitter}: User’s X account (formerly Twitter), if available.
- ${session.title}: Title of the session for speakers, if applicable. If there is more than one session, only the first one will be used.
- ${session.qr}: QR code pointing at the published session in the agenda, if applicable. If there is more than one session, only the first one will be used.
- ${data[index]}: Custom fields, where
indexis the index of the field in the list of custom fields. For example, if you have a custom field for “Company” as the first field, you can use${data[0]}to include that information in the badge.
Ensure that your template includes bleed margins or crop marks required for printing, if applicable. For more details, consult with your printing partner.