On-Site Badges
On-site badges let you design and print attendee labels directly at your event using any ZPL-compatible thermal label printer (such as Zebra printers). Unlike pre-print badges, which are HTML-based and intended to be prepared in advance, on-site badges use ZPL (Zebra Programming Language) and are designed to be printed on demand during the event itself.
This guide explains how to create and manage label templates and print badges using the Koliseo Access Control app.
Requirements
To use on-site badges, your account must have a subscription that includes this feature. You can review the features of the different subscription plans on the pricing and plans page.
You can design and preview label templates on any plan, but printing from the Access Control app requires a qualifying subscription.
You will also need a ZPL-compatible thermal label printer reachable from the Android device running the Access Control app over the local network. The app communicates with the printer via a network socket, so the printer must be connected to the same Wi-Fi or wired LAN as the device — a direct USB connection is not supported.
Navigating to On-Site Badges
- Log into the system.
- In the sidebar menu of your event, select Tickets > Badges.
- Click the On-Site Badges tab (next to Pre-print Badges).
Creating a Template
On-site badge templates are stored per event. You can create up to 20 templates per event. To create your first template:
-
Click Create Label Template.
-
A dialog will appear with a list of predefined templates to start from. Select one that best matches the label size of your printer.

-
You can adjust the Width and Height fields to match the exact dimensions of your label stock. Positions and sizes of all elements will be scaled proportionally when you change the dimensions.
Note: Proportional scaling is a best-effort starting point. After changing dimensions you will likely need to fine-tune individual element values manually. QR code magnification is particularly sensitive to label size — the correct value depends on the printer resolution and the physical space available, so it is worth reviewing it carefully in the live preview after any resize.
-
Click Create to add the template to your event and open the template editor.
Once a template is created you can clone it using the Clone option to create variations without starting from scratch.
Editing a Template
Selecting a template from the list opens the editor. The editor is split into two areas: the template settings and the elements list.

Template Settings
- Name: An internal label to identify this template.
- Width / Height: The physical size of the label in millimetres.
- Dots per mm (dpmm): The resolution of your printer. Common values are
8(203 dpi) and12(300 dpi). Check your printer’s documentation for the correct value.
Elements
Each template is made up of one or more elements. Three element types are available:
Text
Prints a line or block of text on the label.
- Content: The text to display. You can include data placeholders such as
${name}. - X / Y: The position of the top-left corner of the element, in millimetres from the top-left corner of the label.
- Width: The maximum width of the text block in millimetres.
- Font size: Text height in millimetres.
- Line height: Line height in millimetres. Is must be a value greater or equal to the font size.
- Font weight:
NormalorBold. - Max lines: The maximum number of lines before the text is truncated.
- Horizontal align:
LeftorRight.
QR Code
Prints a QR code on the label. The QR code can encode any text or URL — it is not limited to ticket validation. If you want the QR to be scannable by the Access Control app, the data key must include ${ticket.id}. You may also encode a JSON object.
- Data key: The content encoded in the QR code. You can include data placeholders or any other value, such as a URL or plain text, if ticket validation is not required.
- X / Y: Position of the QR code in millimetres.
- Width: Size of the QR code in millimetres.
- Magnification: The dot scale factor used by the ZPL renderer. Higher values produce a larger QR code for the same width.
Line
Prints a horizontal rule to separate sections of the label.
- X / Y: Starting position in millimetres.
- Width: Length of the line in millimetres.
- Thickness: Line thickness in millimetres.
Data Placeholders
Both text and QR code elements support dynamic placeholders that are replaced with attendee data at print time. The following placeholders are available:
-
${name}: The attendee’s full name on Koliseo. -
${uuid}: The attendee’s username on Koliseo. -
${ticket.id}: The unique identifier of the ticket. Include this in a QR code’s data key if you want the Access Control app to be able to scan and validate that badge. -
${twitter}: The attendee’s X account (formerly Twitter), if they have provided one. -
${data[index]}: Answers to event questions, whereindexcorresponds to the order of the question in the event settings. For example,${data[0]}returns the answer to the first custom question.Note: The placeholder only renders a value if the Access Control app has permission to see that answer. This is controlled by the answer visibility setting configured on each question.
Any placeholder that has no data for a given attendee is replaced with an empty string.
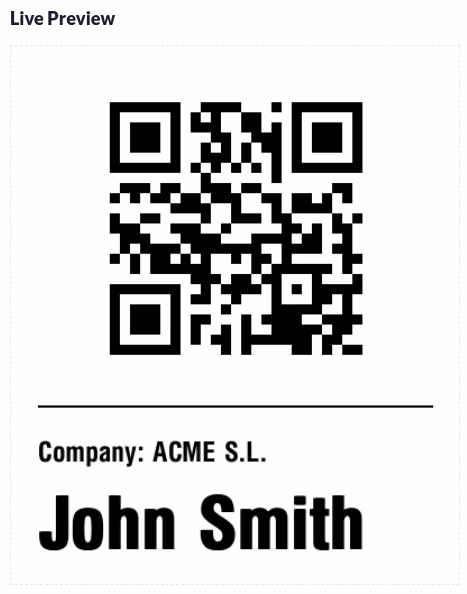
Live Preview
After saving a template, a live preview is rendered, so you can evaluate the layout without needing a physical printer.
The preview updates automatically a short time after each save. If the preview is empty, verify that your template settings (especially Dots per mm, Width, and Height) are correct.
Printing from the Access Control App
Once your templates are set up, badges can be printed directly from the Koliseo Access Control app for Android during the event:
- Open the Access Control app and select the event.
- When you scan or look up a ticket, an option to Print Badge will appear.
- Select the label template to use, and the badge will be sent to the connected ZPL printer.
For information on setting up the app and assigning permissions to volunteers, see the Ticket validation page.